By Clay Shumate
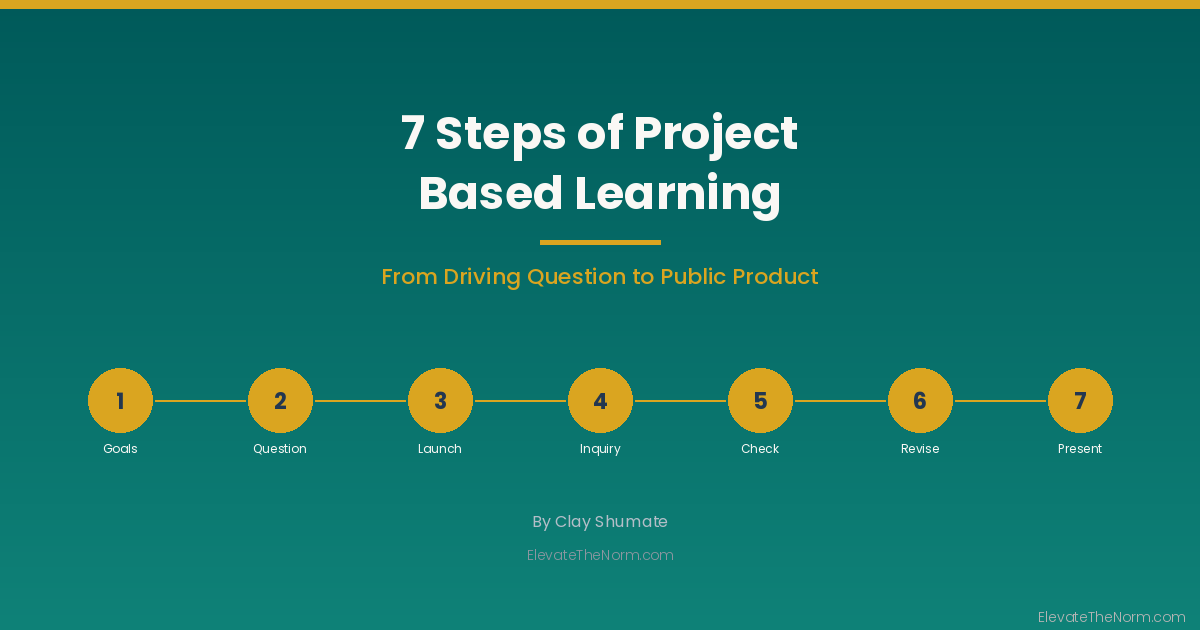
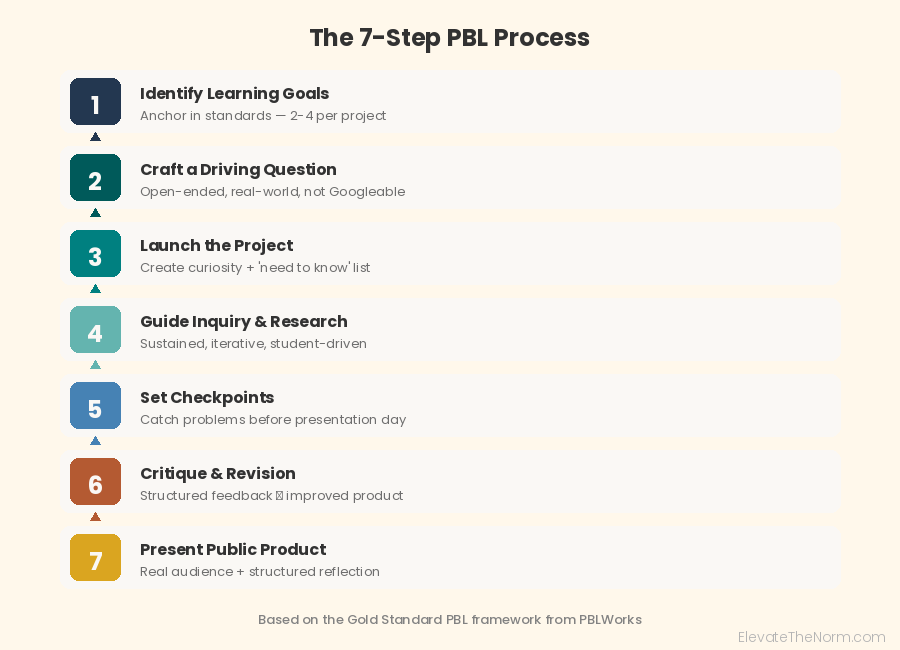
The 7 steps of project based learning move a class from a question worth answering to a product worth defending. They are: identify learning goals, craft a driving question, launch the project, guide inquiry and research, set checkpoints and manage the work, facilitate critique and revision, and present the public product with reflection. Each step has a teacher role and a student role, and skipping any of them is how PBL collapses into a decorated group assignment. Each step works better when teachers and students have reliable project based learning tools—the planning templates, role cards, and critique protocols that keep the process on track. There is also a reviewed list of outside PBL resources worth the download, with the weak ones named.
Why Steps Matter: PBL Without Structure Falls Apart
Project based learning has a reputation problem. Teachers who have tried it and watched it fail usually did not fail at the project — they failed at the process. A class that jumps from “here is your project” to “present on Friday” without the steps in between produces exactly the kind of shallow, off-task, unequal group work that gives PBL a bad name.
The Gold Standard PBL framework from PBLWorks, developed by John Larmer, John Mergendoller, and the Buck Institute for Education, identifies seven essential project design elements: a challenging problem or question, sustained inquiry, authenticity, student voice and choice, reflection, critique and revision, and a public product. Those elements are not decorations. They are structural requirements. Remove any one of them and the project loses what makes it PBL.
The seven steps below translate those design elements into a sequence a teacher can actually follow. They are grounded in PBLWorks’ framework, supported by the research comparing PBL vs traditional teaching, and tested in real classrooms — including mine, where the tables are pushed together, students are always working with somebody, and the projects run while I circulate between groups.
Step 1: Identify Learning Goals and Standards
The teacher’s job: Decide what students must know and be able to do by the end of the project. Anchor these goals in your actual standards — state standards, Common Core, NGSS, C3, whatever your district uses. This is not optional. A project without clear learning goals is an activity, not instruction. If you need a refresher on the definition of project based learning and what separates it from traditional group work, start there.
The common mistake: Designing the fun part first and then trying to reverse-engineer the standards into it. That produces projects where the academic content is an afterthought — the poster looks great but the student cannot explain what they learned.
What to do instead: Start with the standards. Identify two to four that the project will assess directly. Then ask: what kind of work would require students to use these standards to answer a real question or solve a real problem? The project grows from the learning, not the other way around.
A practical tip: write the standards on one side of a sheet of paper and the project idea on the other. If you cannot draw clear lines connecting them, the project needs to change or the standards need to change. One or the other.
Step 2: Craft a Driving Question
The teacher’s job: Write a question that is open-ended, challenging, anchored in real concerns, and aligned to the learning goals from Step 1. This question drives the entire project. If the question is weak, everything after it will be shallow.
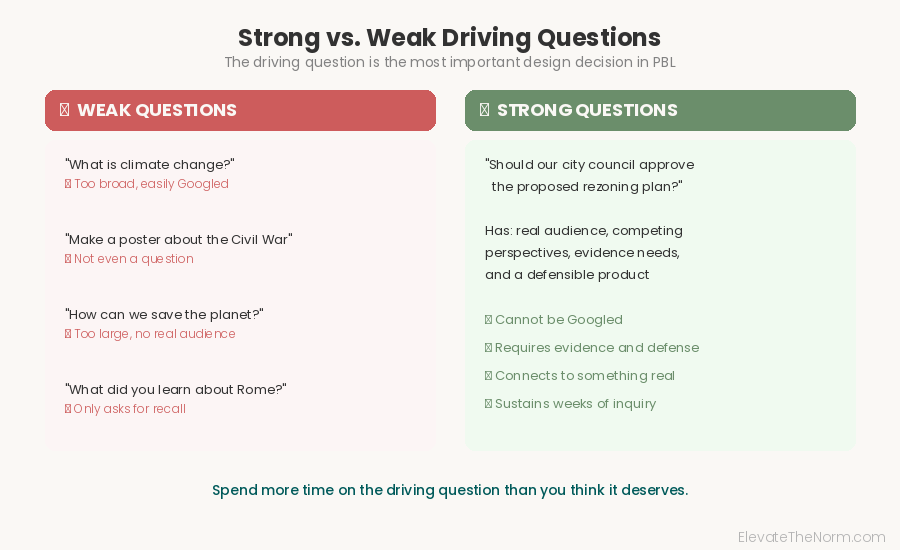
What makes a strong driving question:
- It cannot be answered with a Google search.
- It requires students to gather evidence, weigh competing claims, and defend a position.
- It connects to something real — a community issue, a professional challenge, a decision someone actually has to make.
- It is specific enough to be answerable and broad enough to sustain weeks of inquiry.
What makes a weak driving question:
- “What is climate change?” — Too broad, easily Googled.
- “Make a poster about the Civil War.” — Not a question at all.
- “How can we save the planet?” — Too large, no real audience, no defensible product.
- “What did you learn about ancient Rome?” — Only asks for recall, not application.
A strong example: “Should our city council approve the proposed rezoning plan for the neighborhood south of Main Street?” This question has a real audience (the council), competing perspectives (residents, developers, environmental groups), evidence requirements (zoning data, traffic studies, community input), and a defensible product (a recommendation with data).
Spend more time on this step than you think it deserves. A mediocre driving question produces mediocre projects no matter how well you execute the other six steps. If you want side-by-side models to work from, these driving question examples across four subject areas show what the revision from weak to strong actually looks like.
Step 3: Launch the Project
The teacher’s job: Introduce the driving question in a way that creates genuine curiosity, not just compliance. The launch is the moment students go from “we have a project” to “I actually want to know the answer to this.”
Effective launches include:
- A real-world entry event: a guest speaker, a site visit, a video of the actual problem, a letter from someone who needs the answer.
- A “need to know” list: after the launch, students generate questions about what they need to learn to answer the driving question. This list becomes their research agenda.
- Clear project parameters: timeline, deliverables, team structures, and how the work will be assessed.
The trap: Over-explaining everything on day one. If students walk away from the launch knowing exactly what the final product should look like, you have removed the inquiry. Give them the question and the constraints. Let them figure out the path.
Step 4: Guide Inquiry and Research
The teacher’s job: This is the sustained inquiry step — the one that separates PBL from a group assignment with a poster. Students are not following a worksheet. They are identifying what they need to know, finding sources, evaluating evidence, and building understanding over days or weeks.
What this looks like in practice:
- Students work from their “need to know” list and add to it as new questions emerge.
- The teacher provides direct instruction when the whole class needs it — a lesson on evaluating sources, a skill workshop on data analysis, a mini-lecture on background content — but these lessons serve the project, not the other way around.
- Research is iterative. Students may find that their initial approach does not work and need to change direction. That is not a failure. That is inquiry.
I spend most of this step circulating. The tables in my room are already grouped, so students are working in pairs or small teams by default. Most of what I do is listen. I stop at a group, hear what they are discussing, and decide whether to step in or move on. If I overhear a group building on a premise that is factually wrong — and it happens more often than you would think — I do not announce it to the room. I sit down with that group and ask them to show me where they found it. Usually, the source is a single website or a misread paragraph. We look at it together, and they see the problem themselves. That is more valuable than a correction from the front of the room.
A note on diverse learners: Students with IEPs, 504 plans, or English language needs may require adjusted entry points for inquiry — a modified source list, a graphic organizer, a shorter initial reading, or a paired research partner. The inquiry itself does not change. The scaffolding that gets a student into the inquiry does. Work with your special education and ELL colleagues to design those entry points before the project launches, not after a student stalls.
The common failure point: Letting inquiry drift. Without regular check-ins, some groups will spend two weeks on research and produce nothing usable. Step 5 prevents that.
Step 5: Set Checkpoints and Manage the Work
The teacher’s job: Build structured checkpoints into the project timeline where you review student progress, provide feedback, and catch problems before they compound. This is the project management step, and skipping it is the single most common reason PBL fails.
What checkpoints look like:
- End of week one: Groups submit a research plan — what they are investigating, where they are looking, what they have found so far, and what is still missing.
- Midpoint: Groups present a rough draft, preliminary findings, or a prototype. This is not graded. It is feedback.
- Before the final product: Groups present a near-final version for critique (Step 6).
The teacher’s role during checkpoints:
At my whiteboard table, I pull groups one at a time. They show me what they have. I ask questions: What is your claim? Where is your evidence? What would someone who disagrees say? If the answers are thin, we talk about what needs to happen before the next check-in. If the answers are solid, I push harder: What have you left out? What are you unsure about?
These conversations are not optional. They are the mechanism that prevents the end-of-project crash where one group has done everything and another has done nothing.
A practical tool: A project calendar posted where students can see it, with checkpoint dates circled. Students should know exactly when they will be expected to show progress and in what form.
Step 6: Facilitate Critique and Revision
The teacher’s job: Teach students to give and receive specific, constructive feedback — and then give them structured time to use it. This step is what turns a first draft into a defensible product.
Why critique and revision matter:
PBLWorks identifies critique and revision as one of the seven essential design elements for a reason. A project that is never revised is not PBL. It is an assignment that took longer. Real-world work — journalism, engineering, policy, research, design — goes through multiple drafts. Students need to practice that process, not skip it.
How to structure critique:
- Use a protocol. Unstructured “peer review” devolves into “looks good” within minutes. A simple protocol works: the presenting group shares their work, the audience asks clarifying questions, the audience offers specific feedback (what is strong, what is unclear, what is missing), and the presenting group records the feedback without defending their work.
- Model it first. Show students what specific, useful feedback sounds like versus vague or personal feedback. “Your graph does not label the axes” is useful. “I do not like it” is not.
- Schedule revision time. Feedback without time to use it is performative. Build revision days into the calendar.
The teacher’s additional role: Give your own feedback alongside the peer critique. Students respect peer feedback more when the teacher is also participating in the same process rather than standing outside it. Critique works best when everyone is scoring against the same published criteria, which is what a shared project scoring guide is for.
Step 7: Present the Public Product with Reflection
The teacher’s job: Create an authentic presentation opportunity where students share their work with an audience beyond the classroom — and then lead a structured reflection on what they learned.
What “public” means:
The audience does not need to be the United Nations. It needs to be someone other than you. Options that work in an ordinary school:
- Another class.
- Parents and families at an evening showcase.
- A community panel invited for the occasion — a local business owner, a council member, a professional in the field.
- A recorded presentation shared with a real organization.
- A published piece — a blog, a letter to the editor, a recommendation submitted to the actual audience named in the driving question. For a concrete example of project based learning in action, see how one classroom handled the full cycle.
Why the public audience matters:
When the only audience is the teacher, students calibrate their effort to “good enough to pass.” When someone else will see it — someone they want to impress, someone who might ask hard questions — the standard shifts. The work gets better not because you demanded it, but because the audience did.
Reflection is the step most teachers skip:
After the presentation, students need structured time to think about what they learned — not just the content, but the process. What worked? What did they struggle with? What would they do differently? What did the critique feedback change?
This is not a journal entry for a grade. It is the metacognitive step that turns experience into learning. Without it, students finish the project knowing what they made, but not necessarily what they learned.
A useful reflection prompt: If you had to do this project again with a new group and a different driving question, what is the one thing you would do differently and why?
Common Failure Points Across All Seven Steps
Skipping Step 2 (the driving question): Teachers who start with the product — “we are making a documentary” — instead of the question produce projects where students focus on production quality rather than learning. The documentary looks polished but says nothing original.
Rushing Step 4 (inquiry): In a tight schedule, it is tempting to hand students the information and skip the research. But if students do not find the information themselves, they do not own it. PBL without inquiry is craft time.
Ignoring Step 5 (checkpoints): Every PBL horror story — the group that did nothing, the student who carried the team, the project that went completely off track — is a checkpoint failure. You had weeks to catch it. You did not check.
Treating Step 6 (critique) as optional: Students who present their first draft as their final product have not experienced PBL. They have experienced a long assignment with a due date.
A Practical Planning Checklist
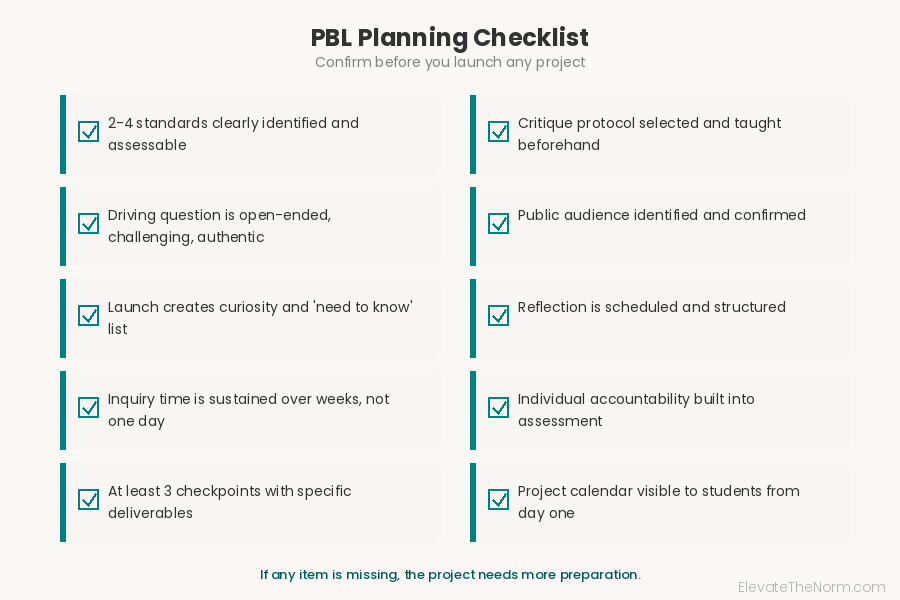
Before you launch a project, confirm:
- Two to four standards are clearly identified and assessable through the project.
- The driving question is open-ended, challenging, authentic, and connected to standards.
- The launch creates curiosity and generates a student “need to know” list.
- Inquiry time is built into the calendar — not just one day, but sustained over weeks.
- At least three checkpoints are scheduled with specific deliverables for each.
- A critique protocol is selected and taught before the critique session.
- The audience for the public product is identified and confirmed.
- Reflection is scheduled and structured.
- Individual accountability is built into the group assessment so one student cannot carry or hide.
- The project calendar is visible to students from day one.
Conclusion
The 7 steps of project based learning are not a formula. They are a sequence of decisions — learning goals, driving question, launch, inquiry, checkpoints, critique and revision, and public product — that keep a project from becoming busywork with a poster board. Skip any step and you will feel it. Rush the driving question and the research is shallow. Skip checkpoints and you find out too late. Skip critique and the product never improves. Skip the public audience and students treat it like homework.
Get the sequence right — and if you need ideas for project based learning to get started — PBL produces something most classroom assignments cannot: students who know what they learned, why it matters, and how to defend it to someone who was not in the room.
For strategies on implementing this sequence inside a standard high-school bell schedule, see project based learning high schools can use without rebuilding the schedule.
How long should a PBL project take?
Most projects that follow all seven steps need at least two to three weeks of class time, though some run a full semester. Shorter projects — one to two days — can incorporate PBL elements, but they rarely sustain the inquiry and revision cycle that makes PBL distinct. The driving question should determine the timeline, not the other way around.
Can I use PBL in a class with a tight pacing guide?
Yes, but it requires planning. Identify two to four standards the project will cover and use the project as the vehicle for teaching those standards, not an addition to your existing lessons. Replace instruction on those standards with the project, do not stack them. PBL is the main course, not the dessert.
What if some groups finish early and others are behind?
This is a checkpoint problem. If you are checking progress at regular intervals, you will catch the groups that are behind before the final deadline. For groups that finish early, add an extension question or have them prepare to serve as peer critics for other groups — a role that deepens their own understanding.
How do I grade individual students in a group project?
Build individual accountability into the assessment. Require each student to submit their own written reflection, defend a specific part of the project during the presentation, or complete an individual component alongside the group work. The group product shows collaboration. The individual assessment shows learning.
What if I have never done PBL before? Should I start with all seven steps?
Start with a smaller project — two to three weeks, one driving question, one product — and include all seven steps even if you simplify them. Skipping steps is what causes PBL to fail, so it is better to do all seven simply than to do three of them elaborately. Your first project will be imperfect. That is normal. Reflect on what worked and adjust the next one.
Do I need special materials or technology for PBL?
No. Some of the strongest projects use nothing but paper, community access, and the students themselves. Technology can enhance research and production, but the seven steps work with or without it. A driving question, a library, and a real audience are more important than a 1:1 device ratio.
How do I handle a student who does not contribute to the group?
Address it at checkpoints, not at the end. When you pull a group to the whiteboard table and one member has done nothing, that is a conversation — not a grade penalty. Ask what the barrier is. Sometimes it is confusion, sometimes it is a group dynamic problem, sometimes it is disengagement that needs a different intervention. The answer changes the response.
Sources
- Larmer, J., Mergendoller, J. R., & Boss, S. (2015). Setting the Standard for Project Based Learning. ASCD/Buck Institute for Education.
- PBLWorks. “Gold Standard PBL: Essential Project Design Elements.” Buck Institute for Education.
- PBLWorks. “Gold Standard PBL: Project Based Teaching Practices.” Buck Institute for Education.
- Condliffe, B. (2017). “Project-Based Learning: A Literature Review.” MDRC Working Paper.
- Larmer, J., & Mergendoller, J. R. (2010). “Seven Essentials for Project-Based Learning.” Educational Leadership, 68(1), 34–37.
- Hattie, J. (2023). Visible Learning: The Sequel. Routledge.
About Clay Shumate
Clay Shumate is a certified secondary Social Studies teacher in the public schools of West Alabama, with seven years of classroom experience, a B.A. in History, and an M.Ed. in Secondary Education. He writes about project-based learning, student responsibility, respect, and practical ways to hold young people to a higher standard while giving them room to learn from mistakes. He is a member of the Society of Professional Journalists and writes to its Code of Ethics; this site’s editorial standards and corrections policy are published in full. More about Clay.